As my students have grown more confident with their programming skills, I’ve looked for ways to make learning even more engaging. Physical computing with the BBC micro:bit has been a real hit! This year, I decided to go a step further by introducing breadboards and traffic light components. It’s been fantastic for building circuits and reinforcing core programming concepts – plus, it’s just great fun for students.
If you’re thinking of going down this road, here are my key takeaways – and one cautionary tale to help you avoid a costly mistake!
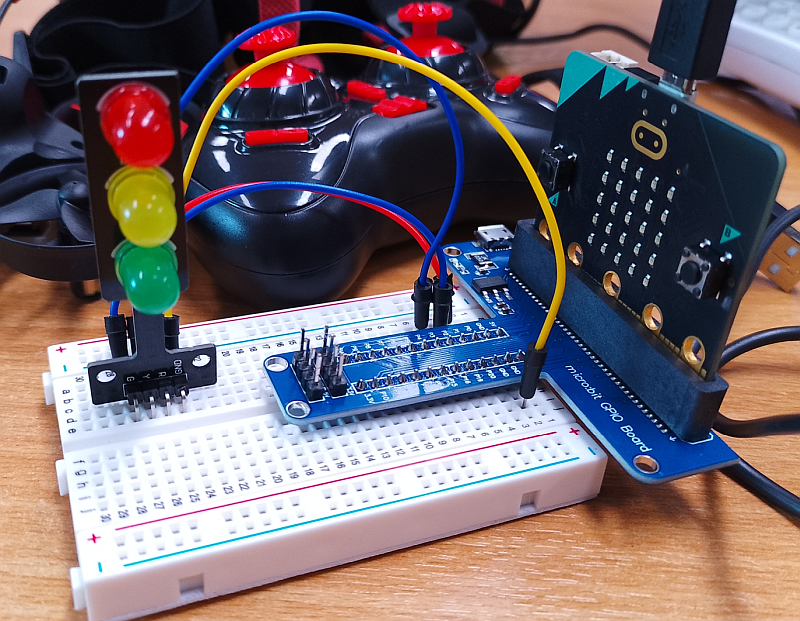
🟢 Getting Started: What to Buy
On a shoestring budget, I turned to AliExpress for components. The prices are fantastic, and we managed to get:
- T-bar micro:bit GPIO board
- Plug-in traffic lights (no need to mess about with individual LEDs and resistors – so much easier for classroom use!)
- Mini breadboards
- Jumper cables
We store these in 1L plastic boxes alongside our micro:bits – a simple and effective way to keep everything organised.
🟡 Recommendation 1: Watch the Jumper Wires!
One thing I didn’t anticipate was how unforgiving the micro:bit can be if students accidentally connect the wrong wires. It turns out that the micro:bit has minimal circuit protection. Twice in one week, we had GPIO circuits fried because students connected the +5V pin directly to GND!
🟨 Lesson learned:
Make sure you explicitly show students how to connect jumper wires safely. Emphasise that they should avoid directly connecting +5V to GND, or only connect positive terminals to the micro:bit pins instead of +5V.
🟠 Recommendation 2: Build Programming Confidence First
Before jumping into hardware projects, we revisited some basic MicroPython programming exercises with the micro:bit. Even the default micro:bit program contains a lot of key programming concepts:
- Comments (lines starting with
#) - Module imports (
from microbit import *) - While loops (
while True:– and the idea of an infinite loop!) - Indentation (critical in Python!)
- Method calls (
display.show(),display.scroll()) - Built-in functions (
sleep()) - Built-in constants (
Image.HEART)
Many students already knew block-based programming or had used Turtle graphics in Python, which really helped. I’d definitely recommend getting students familiar with these ideas before tackling physical computing – it boosts their confidence and makes the jump to MicroPython much smoother.
🟢 Is it worth it? Absolutely!
The Micro:bit Python IDE is incredibly user-friendly. Students love seeing their code come to life on a real device – and it’s far more tangible than a virtual screen.
A few practical tips:
✅ Use 1L boxes to keep devices and components tidy.
✅ Get 80cm USB cables so micro:bits can reach computers without students having to contort themselves to plug them in!
🔴 When All Else Fails: Keep it Fun!
One final tip – if you need a fallback or a quick, fun activity, try Chris Lovell’s “Red Light Green Light” activity. Students always enjoy it, but here’s a crucial note: only program ONE micro:bit to switch from red to green! Otherwise, you’ll end up with chaos.
You can find my version of this game along with some of my micro:bit resources (though they need updating) here:
👉 Clickschool micro:bit resources
⚡️ Final Thoughts
Physical computing with the Micro:bit is one of the most engaging and rewarding ways to bring programming concepts to life. Sure, there are pitfalls (like blown GPIO circuits – ouch!), but with a bit of prep and clear instructions, you’ll see your students thrive.
Have fun exploring – and if you have any top tips of your own, I’d love to hear them!